I’ve used AVR microcontrollers both for hobbies and work projects. These versatile microcontrollers ran the code I programmed them with, but once the final device was shipped, it was hard to change the firmware (the software running on the microcontroller): The user needed an ISP programmer and the software tools to update the firmware. A more convenient solution is to use a bootloader. The bootloader is a small program that runs in a separate memory space on the microcontroller separated from the main application space. It can accept firmware upgrades from various sources (USB is often used) and dump them to the main application space. More complex implementations can do automated upgrades via the Internet offering transparency to the end user.
Getting started
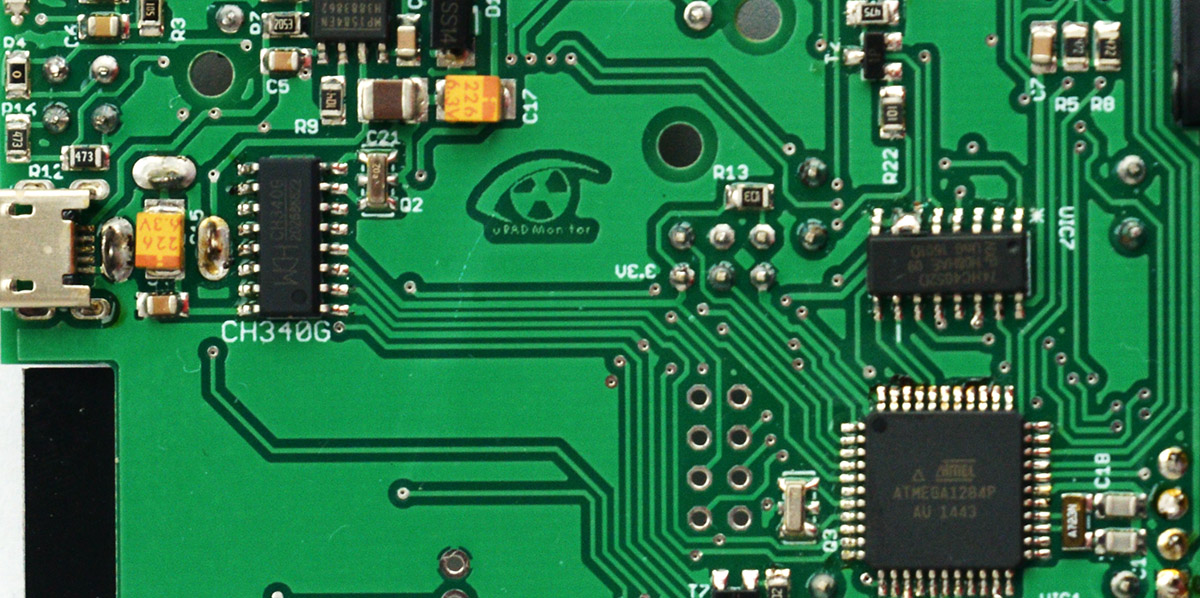
I will be using an atmega1284p microcontroller. The Atmega1284p has a flash space of 64K words, or 128K bytes, organised in 512 pages of 128 words each. Here is the microcontroller datasheet.
My plan is to have a bootloader and a main application so the bootloader will run first, then jump to the main application address. This approach will be used to allow firmware upgrades via USB in some of the devices I am currently designing.
The bootloader is just a regular application, developed like any other. But the bootloader will take the main application code from a given source, and dump it to address 0 in the flash space, then jump there. The main application is just a simple pin toggle code, because I have a speaker connected to that pin and debugging becomes easy:
#include
#include
int main(void) {
	DDRD |= 1 << PD4;
	while (1) {
		PORTD |= 1 << PD4;
		_delay_ms(5);
		PORTD &= ~(1 << PD4);
		_delay_ms(1000);
	}
}
Really simple code, toggling pin PD4 every second. Compiling and linking this code with -g -Wall -Os -mmcu=atmega1284p, gives an ihex of only 594 bytes. I will store the main application code as an array in the bootloader code, adding some extra 0xFF padding to fill one page (128x2 = 256 Bytes):
    uint8_t prog[] = {
    	0x0C,0x94,0x46,0x00,0x0C,0x94,0x50,0x00,0x0C,0x94,0x50,0x00,0x0C,0x94,0x50,0x00,
    	0x0C,0x94,0x50,0x00,0x0C,0x94,0x50,0x00,0x0C,0x94,0x50,0x00,0x0C,0x94,0x50,0x00,
    	0x0C,0x94,0x50,0x00,0x0C,0x94,0x50,0x00,0x0C,0x94,0x50,0x00,0x0C,0x94,0x50,0x00,
    	0x0C,0x94,0x50,0x00,0x0C,0x94,0x50,0x00,0x0C,0x94,0x50,0x00,0x0C,0x94,0x50,0x00,
    	0x0C,0x94,0x50,0x00,0x0C,0x94,0x50,0x00,0x0C,0x94,0x50,0x00,0x0C,0x94,0x50,0x00,
    	0x0C,0x94,0x50,0x00,0x0C,0x94,0x50,0x00,0x0C,0x94,0x50,0x00,0x0C,0x94,0x50,0x00,
    	0x0C,0x94,0x50,0x00,0x0C,0x94,0x50,0x00,0x0C,0x94,0x50,0x00,0x0C,0x94,0x50,0x00,
    	0x0C,0x94,0x50,0x00,0x0C,0x94,0x50,0x00,0x0C,0x94,0x50,0x00,0x0C,0x94,0x50,0x00,

    	0x0C,0x94,0x50,0x00,0x0C,0x94,0x50,0x00,0x0C,0x94,0x50,0x00,0x11,0x24,0x1F,0xBE,
    	0xCF,0xEF,0xD0,0xE4,0xDE,0xBF,0xCD,0xBF,0x0E,0x94,0x52,0x00,0x0C,0x94,0x65,0x00,
    	0x0C,0x94,0x00,0x00,0x54,0x9A,0x5C,0x9A,0x8F,0xE0,0x97,0xE2,0x01,0x97,0xF1,0xF7,
    	0x00,0xC0,0x00,0x00,0x5C,0x98,0x9F,0xEF,0x29,0xE6,0x88,0xE1,0x91,0x50,0x20,0x40,
    	0x80,0x40,0xE1,0xF7,0x00,0xC0,0x00,0x00,0xEE,0xCF,0xF8,0x94,0xFF,0xCF,0xFF,0xFF,
	0xFF,0xFF,0xFF,0xFF,0xFF,0xFF,0xFF,0xFF,0xFF,0xFF,0xFF,0xFF,0xFF,0xFF,0xFF,0xFF,
	0xFF,0xFF,0xFF,0xFF,0xFF,0xFF,0xFF,0xFF,0xFF,0xFF,0xFF,0xFF,0xFF,0xFF,0xFF,0xFF,
	0xFF,0xFF,0xFF,0xFF,0xFF,0xFF,0xFF,0xFF,0xFF,0xFF,0xFF,0xFF,0xFF,0xFF,0xFF,0xFF,
    };
Reminds me of the 13bytes overwriting virus (findfirst/findnext/copy) you could actually install by typing the bytes learned by hard in an editor on the target computer. The sequence above is the PD4 toggle code in AVR8 machine code.
To copy this to the flash, in the main application space, there is a code example in avr/boot.h that does most of the job right away:
void boot_program_page (uint32_t page, uint8_t *buf) {
uint16_t i;
uint8_t sreg;
// Disable interrupts.
sreg = SREG;
cli();
eeprom_busy_wait ();
boot_page_erase (page);
boot_spm_busy_wait (); // Wait until the memory is erased.
for (i=0; i
The complete code is a one-pager:
#include
#include
// define prog
// define boot_program_page
int main(void) {
// long beep in bootloader
DDRD |= 1 << PD4;
PORTD |= 1 << PD4;
_delay_ms(100);
PORTD &= ~(1 << PD4);
_delay_ms(1000);
//start at flash_start = 0x0000
boot_program_page( 0, prog);
//start the actual program
asm("jmp 0");
// bootloader ends here
}
Compiling the booloader code generates a HEX file. But you need to make sure the destination address is correctly set, in this case 0x1E000 counted as the byte offset (format used by GCC), directive -Ttext=0x1E000:
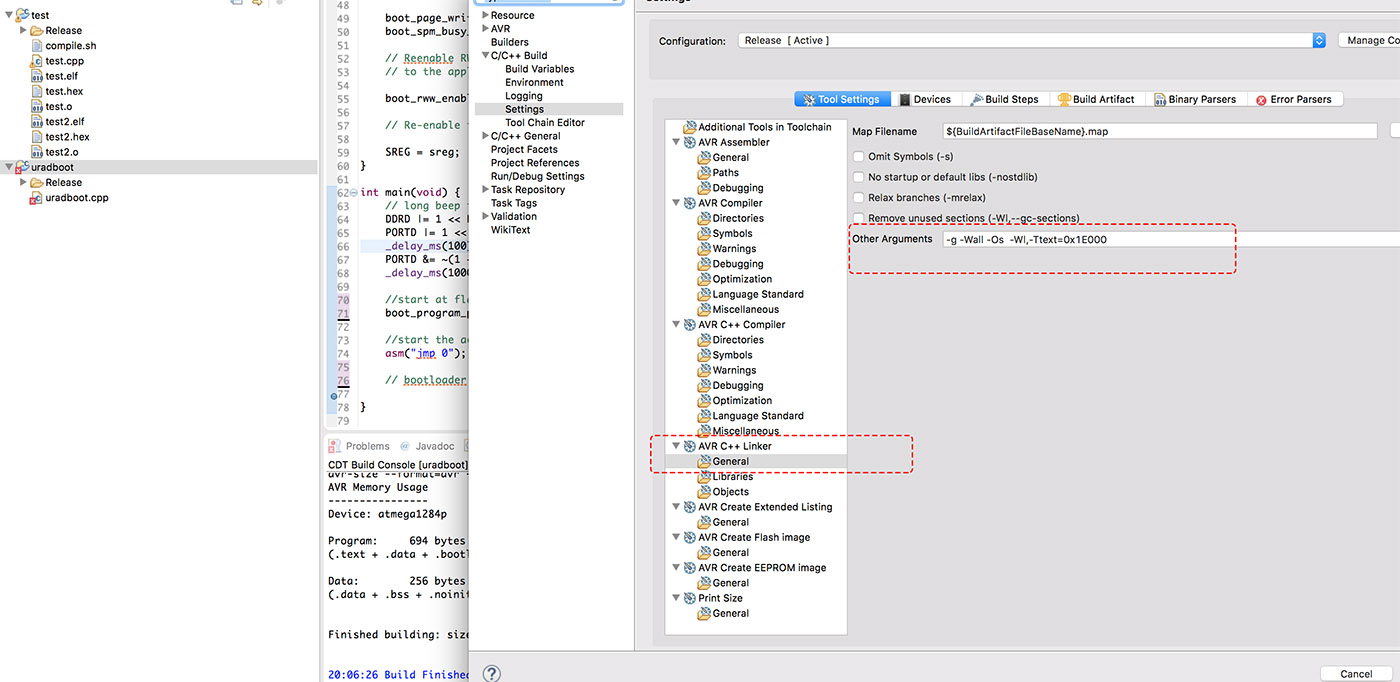
This matches the fuse settings, where Boot Reset Vector needs to be enabled, and the boot flash section address must be set to $F000:
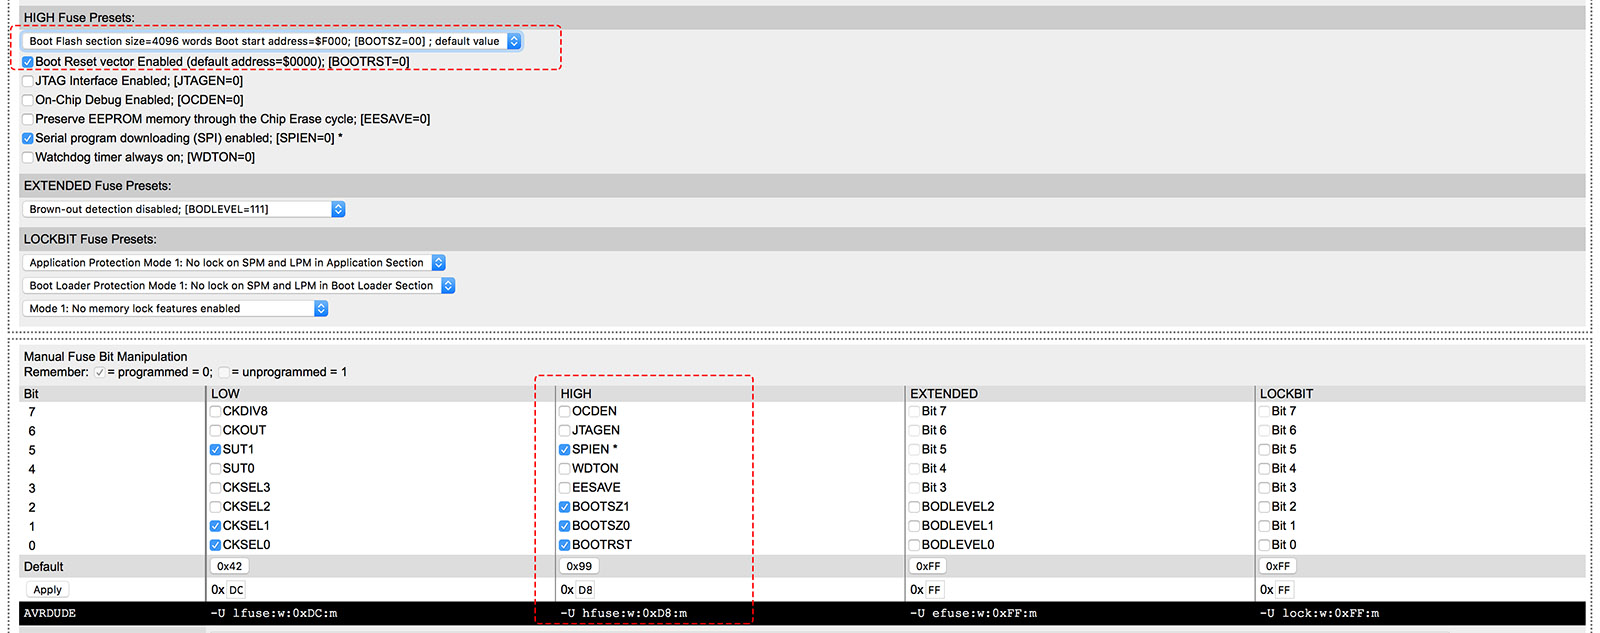
What's the meaning of all these constants you would ask? Let's take it in reverse direction:
The fuse settings define the size of the bootloader flash section, out of 4 possible options. The values below apply to the atmega1284p microcontroller:

The maximum size which is also the option I selected is 4096words or 8192bytes, the size of the entire flash space of the Atmega8. So I wouldn't complain about space constraints, on the other hand the Atmega1284p is a very generous microcontroller. The datasheet shows the memory spaces on page 279:

The Fuse settings address is given as a word count, the format used by Atmel in all their documentation. So that is 0xF000 words, or 2 x 0xF000 = 0x1E000, exactly the value we pass to GCC. Be careful about this step, as placing the code in non-bootloader section will make it impossible to use boot_page_write and dump anything to the flash memory.
The bootloader code is transferred to the atmega128p with the following:
# write fuses
avrdude -p atmega1284p -c usbasp -U lfuse:w:0xDC:m -U hfuse:w:0xD8:m -U efuse:w:0xFF:m -U efuse:w:0xFF:m -U lock:w:0xFF:m
# write flash
avrdude -V -p atmega1284p -c usbasp -U flash:w:uradboot.hex:i
Results
The bootloader will do a 100ms beep, dump the "prog" array content to flash space address 0, then jump there to start the main application code, which will do a short beep every second. So running this code will result in then every second. Nothing fancy, but the concept behind is great, as it allows for some truly outstanding and useful applications, one being able to do firmware upgrades on the fly.
Resources:
The code for this tutorial is available here or on Github.
Brad Schick, 2009, AVR Bootloader FAQ
AVR Fuse calculator
egsguy, Simple Bootloader AVR Forum Thread