The new generations benefit of an advance over their predecessors. This is a simple equation that guarantees progress. For that I can do a simple comparison between the toys I had as a child and my daughter’s new IOT Swing that I just assembled.
An IOT Swing
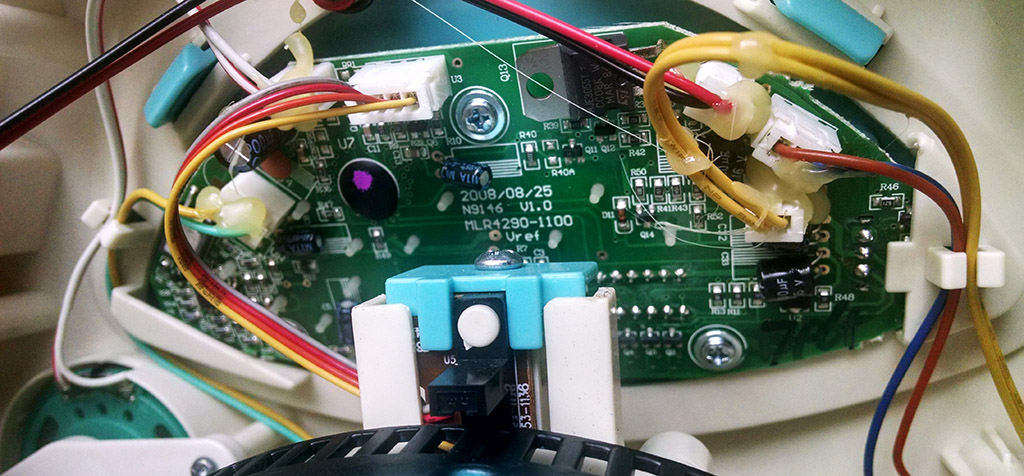
Initially, this was a nice Fisher-Price Precious Planet swing. It is an older model running solely on batteries, so what I did was to modify it for use with an adapter from the power socket directly. Then one day I switched the adapter for a higher voltage one thinking it will be fine (???) and poof, the electronics were burned in an instant. The internals containing an epoxy blob chip among some other semiconductors were to hard to fix but the motors were fine.
My solution idea was to do an upgrade and go for an NodeMCU ESP8266 board as the new control board. Two P-CH mosfet switches controlled by the NodeMCU were enough to drive the motors, while the ON/OFF/SPEED control was implemented … wirelessly via a smartphone! Here’s the swing working again, and my daughter happy:
The circuit
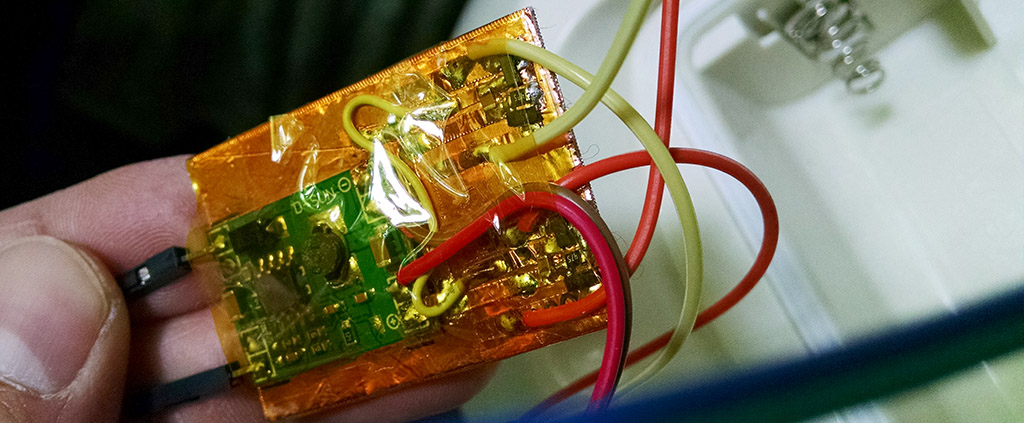
The swing motor is just an electro-motor needing pulses to make the swing oscillate. The other one is a rotor moving the hanging toys in a circle, and just needs power to run. So both motors could be controlled via a simple PCH switch with digital pins from the NodeMCU board. I just had some SMD components at hand, as for the PCB, I created one using copper foil, cardboard and kapton tape, following the board design.
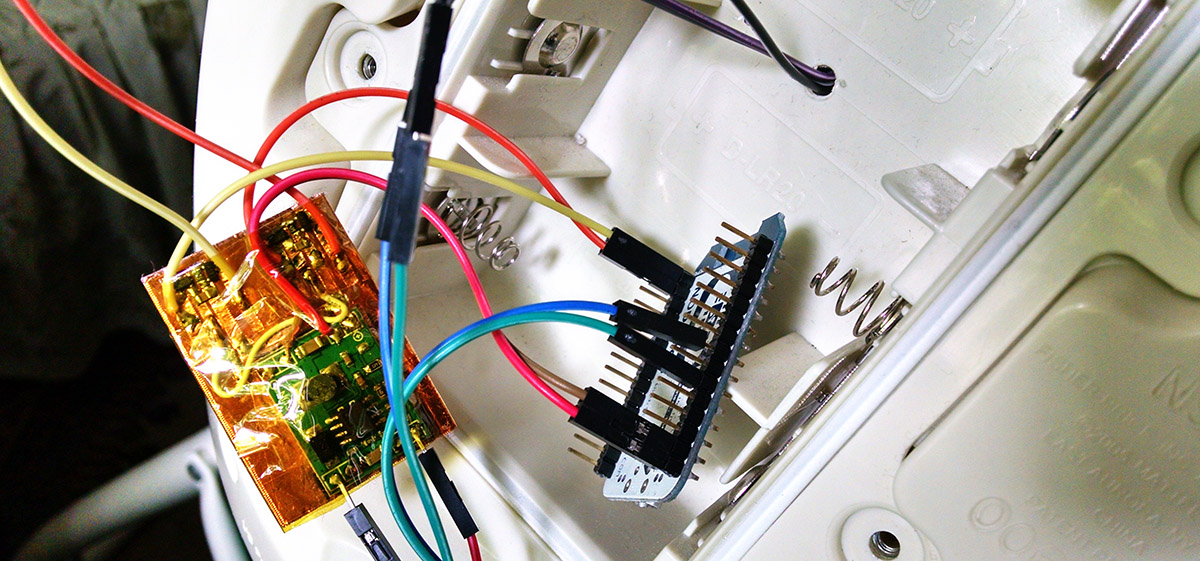
I added a DC-DC step-down converter board adjusted for 5V, to make sure the circuit can take any voltage now. Two of the switches below were created, one for each motor:
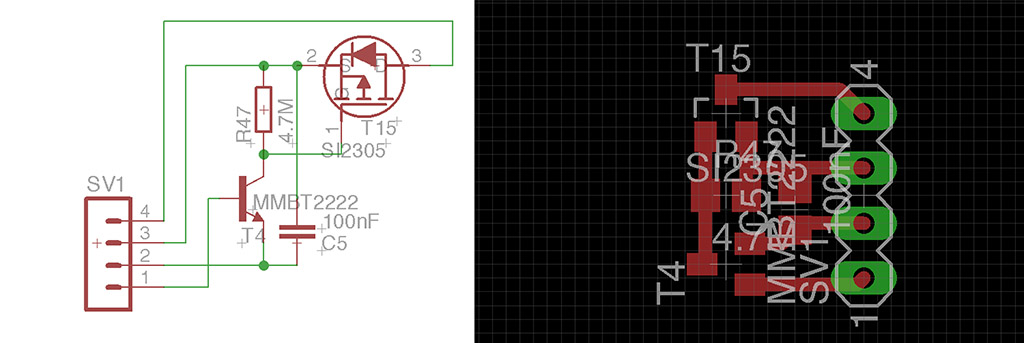
The NodeMCU pins D0 and D1 were used to control these two. The first would take some pulses to make the swing oscillate, while the second would simply go on off.
The code
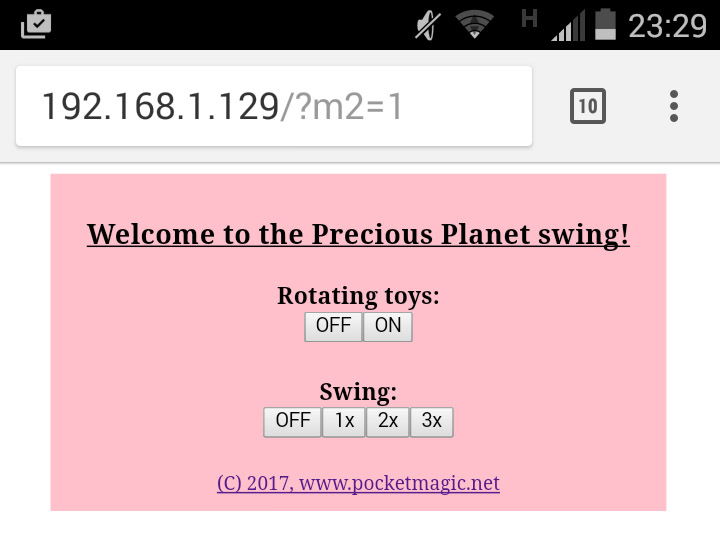
This project had to be done quickly due to lack of time, so the code was written using Arduino for NodeMCU. The code implements a mini webserver where you can connect with the smartphone to control the Swing. Yes, the Swing now has an IP and runs an embedded webserver. The configuration page was made in pink colors. The commands come as HTTP GET parameters which are interpreted by a simple parser in the code. The rest of the logic is straight forward:
/**
* An IOT Swing with NodeMCU
* (C) 2017, Radu Motisan , radhoo.tech@gmail.com
* www.pocketmagic.net
*/
#include
#include
#include
#include
#define MAX_BUFFER 800
char buffer[MAX_BUFFER];
ESP8266WebServer server ( 80 );
const char *ssid = "WRM_2.4GHz";
const char *password = "qq_wifi_4929";
const int pinM1 = 16; // GPIO16 - D0
const int pinM2 = 5; // GPIO5 - D1
int speedM2 = 2;
void handleRoot() {
server.send ( 200, "text/html", "IOT Toys
The control interface
The above code contains the HTML code that creates a simple control interface with a few buttons:
The speed is controlled by adjusting the pulse intervals, but as my daughter grew in weight, the numbers had to be adjusted!
This was a quick and efficient way to fix this toy, and I can add that the NodeMCU is an excellent quick prototyping tools, having sufficient processing power, memory but also embedded Wifi Connectivity in a tiny package. It worked fine for this project.