The Microchip RN2483 and the RN2903 are Low-Power Long Range LoRa® Technology Transceiver Modules, in the same package and Pin compatible. The RN2483 is intended for the 433 MHz and 868 MHz Frequency Bands (Europe), while the RN2903 is for the 915 MHz Frequency Band (US, Taiwan). I used the RN2483 in my first LoRaWAN project, some time ago.
While LoRaWAN technologies have seen an impressive recent boost and Microchip’s modules are among the first on the market, the number of entries in the firmware release notes is rather low, despite huge community interest. Probably things will change to the bright side when Microchip will release the source code for the two. Before that happens, let’s take advantage of what is available now, and see how we can upgrade the firmware on these modules for the latest features and fixes.
Architecture
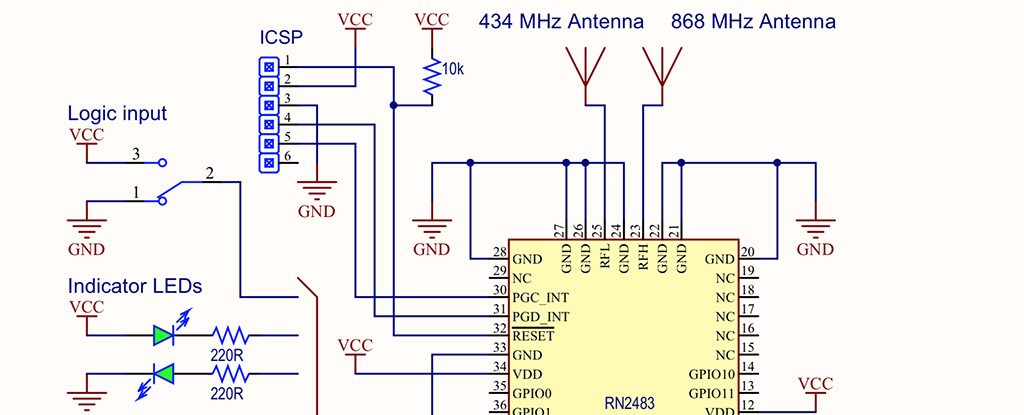
Both modules are a combination of a Semtech SX1276 transceiver and a PIC18LF microcontroller:
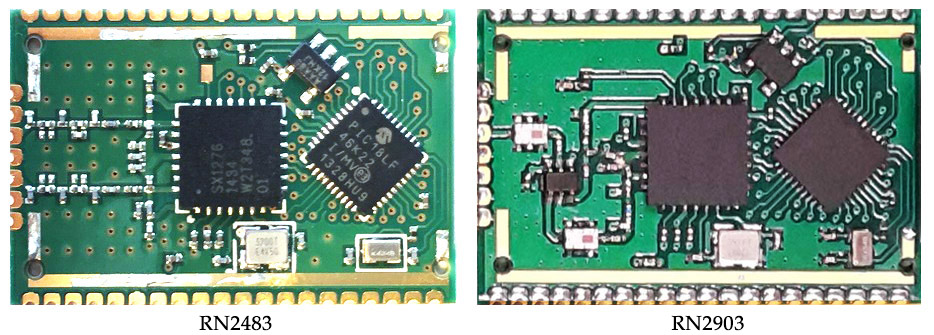
For the RN2483 there’s a 32MHz crystal, PA_BOOST unused, shared TX and RX network topology, 32KHz crystal. On the RN2903 the PA_BOOST pin is used to get +20dBm, there’s a RF Switch and two band-pass filters.
More information is available here:
RN2483 Datasheet
RN2483 Command reference User’s guide
RN2903 Datasheet
RN2903 Command reference User’s guide
Download the new firmware
You can find them on the Microchip website, here’s v1.0.3 firmware for the RN2483 and this other location holds the v1.0.3 firmware for RN2903. Later versions will be published on the product webpage, right under Documentation / Software (RN2493 / RN2903). Both firmware zip files contain a “combined” HEX that is bigger in size, and an “offset” HEX slightly smaller.
Firmware upgrade options
We are interested in upgrading the firmware running on the PIC18LF microcontroller to the latest software developed by Microchip.
Method 1, RNXXXX DFU + LoRaDevUtility
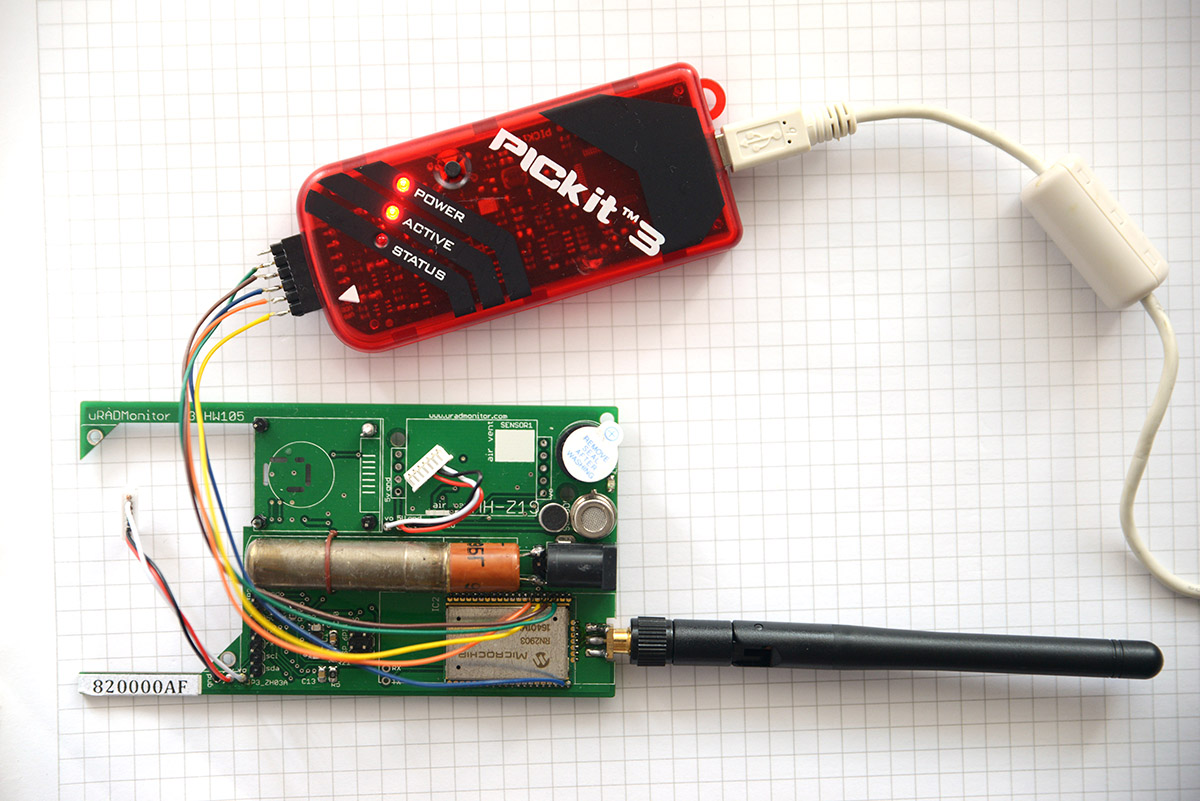
We can use the DFU feature of the RN modules and burn the software via the UART, using the existing bootloader installed in these devices. I went for this one and tested the upgrade on a RN2903, already installed in circuit on an uRADMonitor A3 PCB
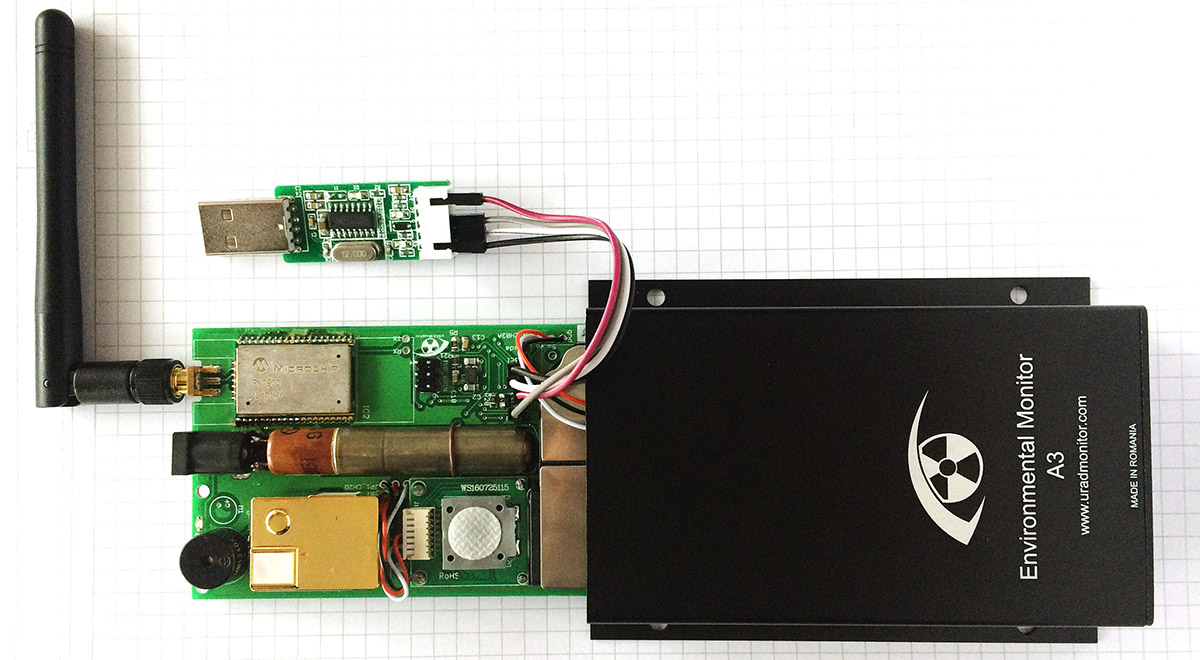
The board hosting the RN2903 already had a pin header with UART connections RX/TX, VCC and GND exposed. So I only needed a simple UART2USB adapter, I used one based on CH340G, but you can find many alternatives here.
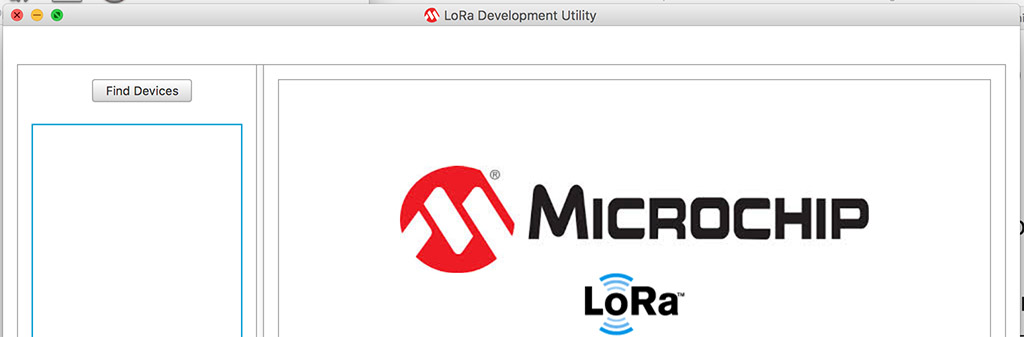
Microchip provides a comprehensive software package that will do the job, named the “Lora Development Suite”, available for Windows, Linux and MacOS. Initially I was a bit disappointed by the enormous size of this software package, since I only wanted a tool to send the “sys eraseFW” command then push the next firmware bytes down the UART link. Add this to the fact that the MacOS variant won’t discover the RN module no matter what how many times I pressed the “Find Devices” button:
Successful upgrade
I had to install the Windows version of the Lora Development suite, in a virtual machine running on MacOS, and have the USB port virtualised to the Windows Environment so the software could talk to the RN module via the USB2UART adapter. Here’s a quick test via Putty, just to see the output of “sys get ver”, but done after the upgrade:

The Windows variant of the Lora Suite recognised the device right away:
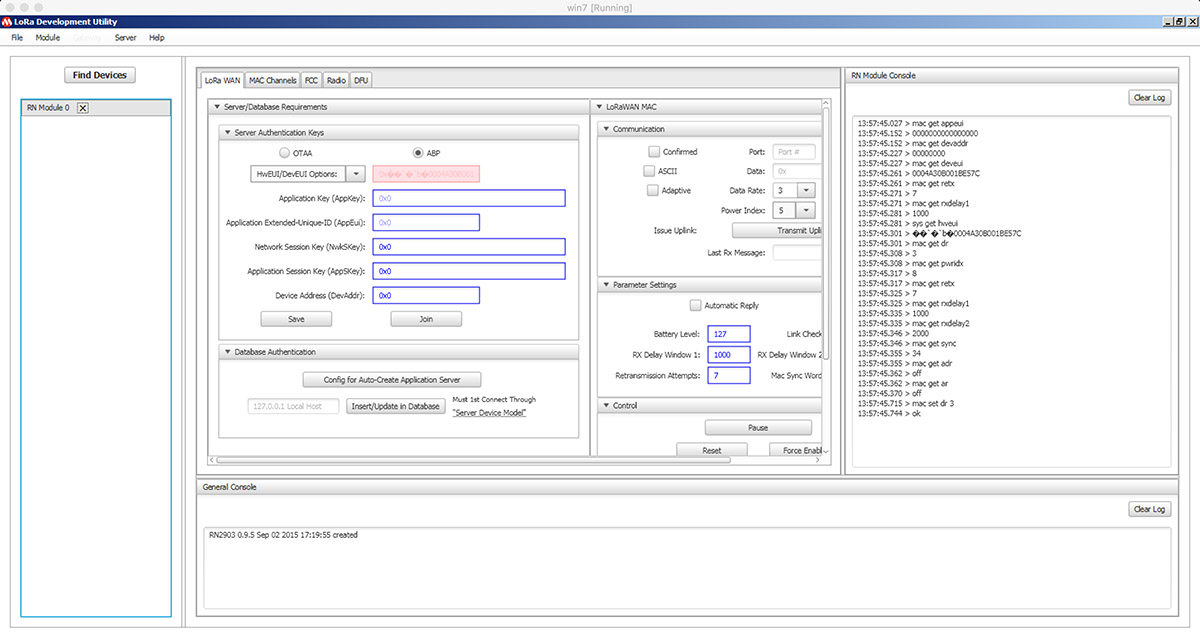
Apparently there’s a reason for the big size of the software package, you get tons of feature for testing and configuring the RN modules. The Lora Suite is awesome, it will take me some time until I test all of these cool features.
Next, go to the DFU tab and select the firmware file. For DFU you need the smaller file, in some releases named “OFFSET”.
BE CAREFUL: after you press the button, the LoRaDEVUtility issues the “sys eraseFW” command without checking the file you provided or whether you provided a file at all! What this means is that if your file is invalid, you end us with a bricked module and the only solution will be the PicKit 3 ICSP update! Really stupid, the LoRaDEVUtility needs to be improved, but until they do be careful.
If ready, click “update firmware”.
A few seconds later, you will get the confirmation message. Should this fail in any way you can still do the upgrade via the ICSP way with a PICKIT3 (see last chapter below).
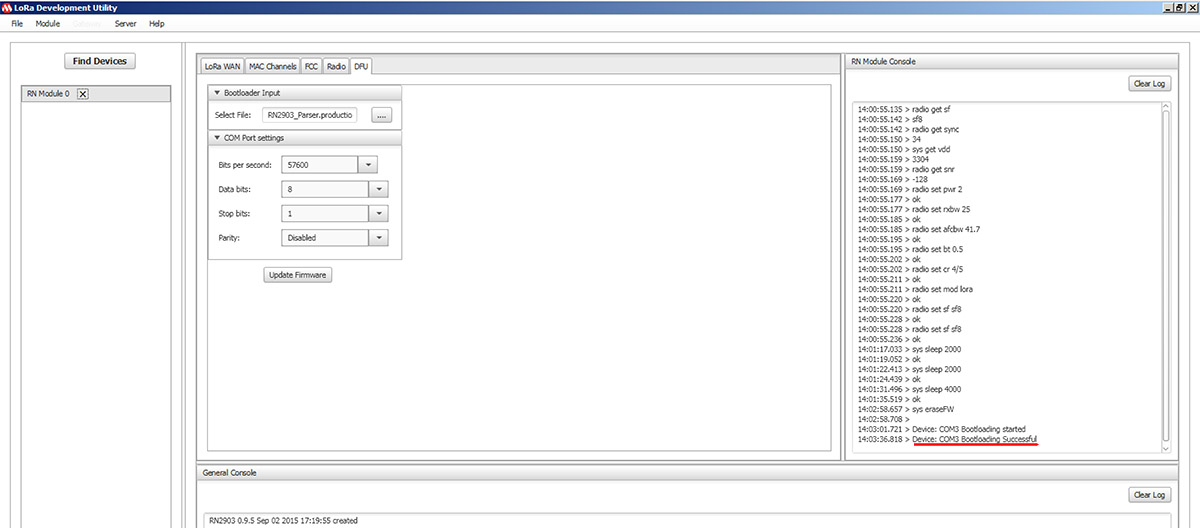
The new version is now displayed. Success!

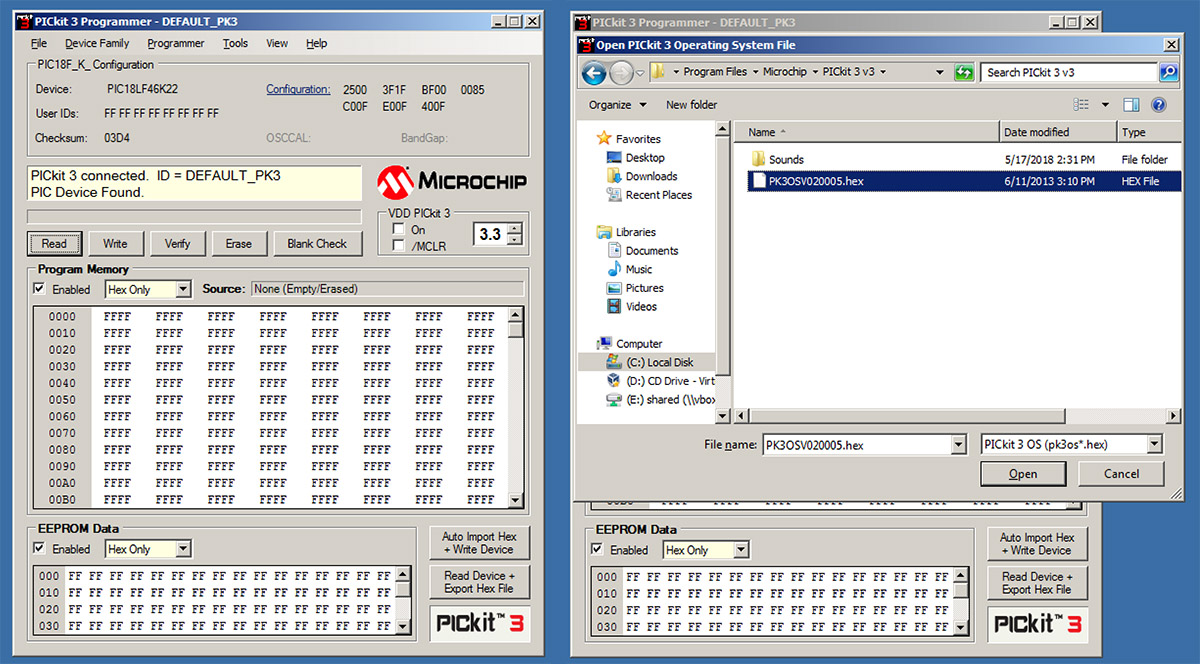
Method 2, PicKit3 and ICSP firmware
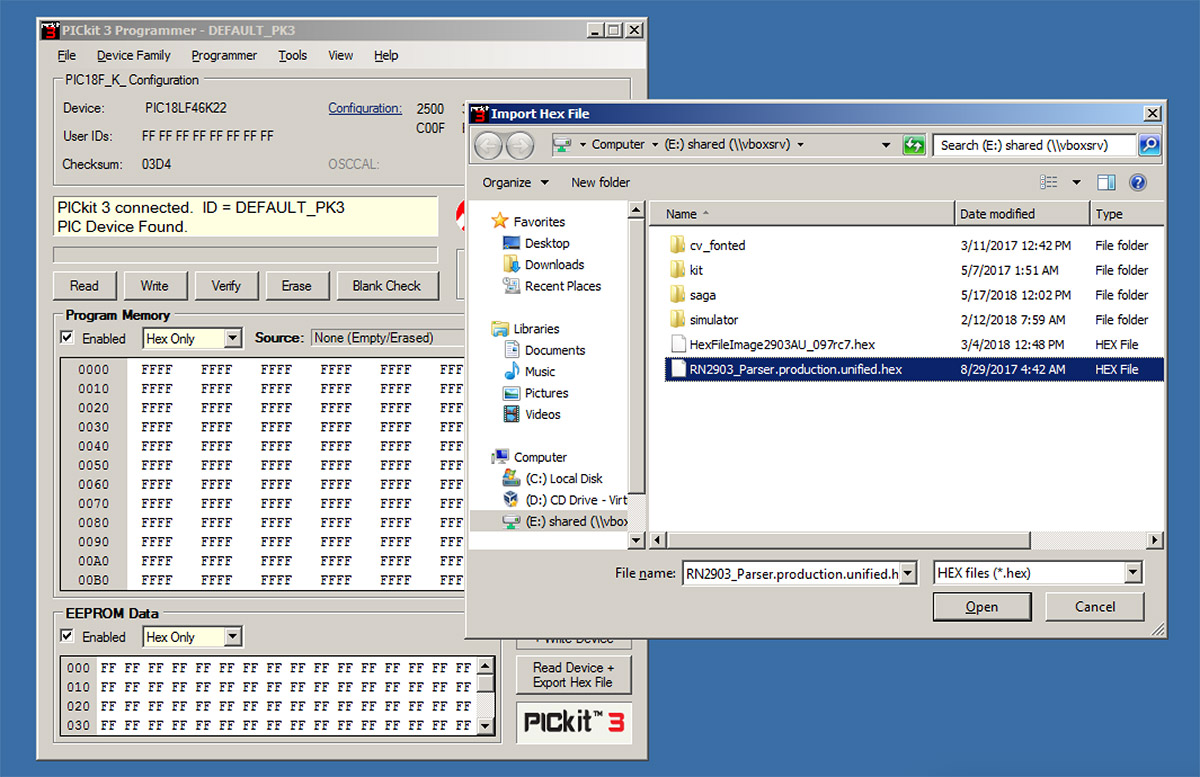
Second update option is to use a PicKit3 programmer, connect it directly to the PIC pins (yes, they are exposed), and burn the software directly. We will be using the larger hex file, located in the “COMBINED” subfolder of the firmware zip file.
You can get a PICKIT3 for about $10 here. Getting it ready is easy. First install the PICKIT3 hex:
Do the wiring. Here’s the wiring on a real setup:
And finally, burn the new hex file:
Need any help? Just drop a comment.