
As a follow-up to Radu’s Atmega8 and enc28J60 for ethernet support article, I used the libraries to implement an ATmega8 UDP client using ENC28J60 that broadcasts a simple “Hello World” message over Ethernet.
Circuit Diagram is exactly the same as simple web-server project(take a look at Schematic&Docs in the project folder). Do not forget to connect CS to PORTB2 if you are using Atmega8 and modify CS pin section in enc28j60.c library.
I’m going to explain how to modify some header files to make a simple UDP client in the rest of this article.
In order to reduce final code size, we should adjust ip_config.h and select functions related to UDP client and deselect the rest. Following is my ip_config.h file contents:
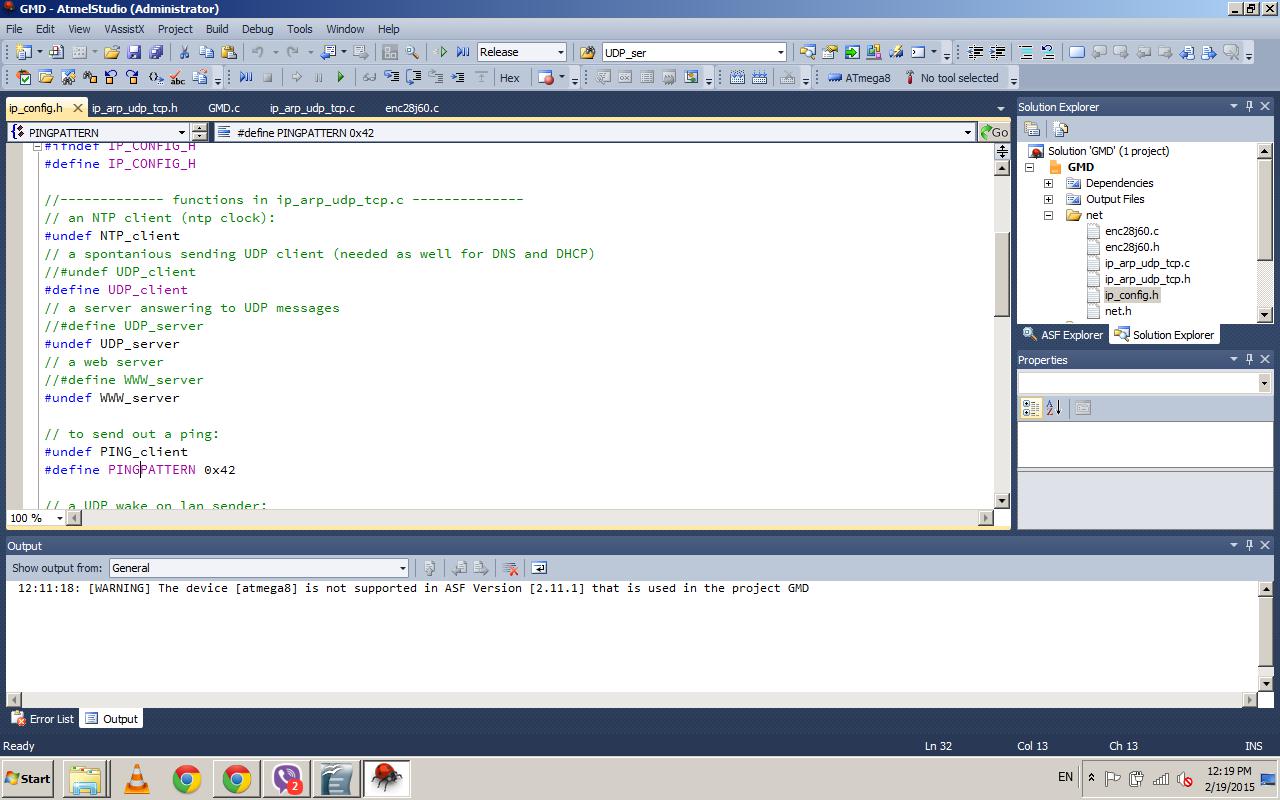
Illustration 1: ip_config.h file contents
As you can see, I #undef all functions except UDP_client. This is what we need to send UDP messages.
In next step, you may need to configure ipnetmask regarding to your network settings. Open ip_arp_udp_tcp.c and search for #if defined (ALL_clients)
Then you can see some codes like the following:
#if defined (ALL_clients)
static uint8_t ipnetmask[4]={255,255,255,255};
static uint8_t ipid=0x2; // IP-identification, it works as well if you do not change it but it is better to fill the field, we count this number up and wrap.
const char iphdr[] PROGMEM ={0x45,0,0,0x82,0,0,0x40,0,0x20}; // 0x82 is the total len on ip, 0x20 is ttl (time to live), the second 0,0 is IP-identification and may be changed.
#endif
As I mentioned before, you may need to change ipnetmask. I changed it to:
static uint8_t ipnetmask[4]={255,255,255,0};
Now we have finished configurations needed for making a UDP client.
In the next step we define some necessary variables in the code:
static uint8_t mymac[6] = {0x00,0x1b,0x77,0x71,0x48,0xf0};
static uint8_t myip[4] = {192,168,1,24};
static uint8_t dis_mac[6] = {0xff,0xff,0xff,0xff,0xff,0xff};
static uint8_t dis_ip[4] = {192,168,1,255};
The first two lines of code defines your UDP client mac address and ip respectively. Set these two
parameters that match your network settings.
The next two lines define destination mac and ip address. As we want to broad cast the message that anyone
who is listening for a UDP message on a specific port can receive it, I set destination ip to 192.168.1.255
(Note that you may change it regarding your network settings). Next we need to find the default gateway
mac address as destination mac address. It is usually ff-ff-ff-ff-ff-ff but we can find it by entering arp -a
command in a command prompt window:

There is a function to get mac address using ip but I will use it in next revisions.
NOTE: If you want to send your message to a specific device, put its IP and MAC address in dis_mac and dis_ip variables.
Next we define a working buffer. You may change buffer size regarding your requirements:
#define BUFFER_SIZE 500
static uint8_t buf[BUFFER_SIZE+1];
Next we setup Ethernet interface:
uint16_t plen = 0, dat_p = 0;
enc28j60Init(mymac);
You may want to configure Magjack leds. For more information take a look at ENC28J60 datasheet. I
configure leds as the following:
// Magjack leds configuration, see enc28j60 datasheet, page 11
// LEDB=yellow LEDA=green
// 0x476 is PHLCON LEDA=links status, LEDB=receive/transmit
// enc28j60PhyWrite(PHLCON,0b0000 0100 0111 01 10);
enc28j60PhyWrite(PHLCON,0x476);
Then we need to initialize ip/ethernet layer with the parameters we defined before:
init_ip_arp_udp_tcp(mymac,myip);
If you want to handle pings, you must receive packets and call packetloop_arp_icmp_tcp function:
dat_p=packetloop_arp_icmp_tcp(buf,enc28j60PacketReceive(BUFFER_SIZE, buf));
the function check to received packets and send a reply to ping requests. You should call this function
continuously with a acceptable delay otherwise ping request will be timed out.
In the next step we should fill the buffer and call some functions to send UDP packets:
//a simple way to fill the buffer
buf[UDP_DATA_P]='H';
buf[UDP_DATA_P+1]='E';
buf[UDP_DATA_P+2]='L';
buf[UDP_DATA_P+3]='L';
buf[UDP_DATA_P+4]='O';
buf[UDP_DATA_P+5]=' ';
buf[UDP_DATA_P+6]='W';
buf[UDP_DATA_P+7]='O';
buf[UDP_DATA_P+8]='R';
buf[UDP_DATA_P+9]='L';
buf[UDP_DATA_P+10]='D';
//call a function to prepare buffer data to send
send_udp_prepare(buf,5001,dis_ip,5001,dis_mac);
In the above function call, the first parameter is the buffer, second is source port. Source port can be any port
and has no effect in this project. We determined dis_ip and dis_mac before. The second 5001(shown in bold
style) is the port number which the UDP message will be sent through. I set it to 5001 but you can change it.
Next we call send_udp_transmit to send the prepared buffer data:
send_udp_transmit(buf,11);
11 is our “HELLO WORLD” message length.
In the sample project, I put a delay and a line of code that toggles a LED.
That’s it. We finished the code.
In the rest of this article, I will describe a test method using a simple udp/tcp client server program.
EchoTool is a command line echo server and client for windows. You can read about and download it from
http://bansky.net/echotool/
after downloading it. Copy it to a folder and run it from a command line:
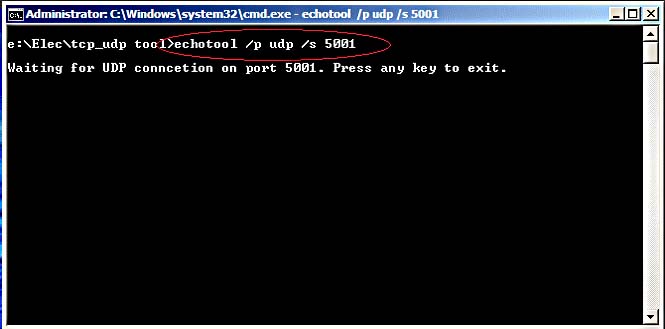
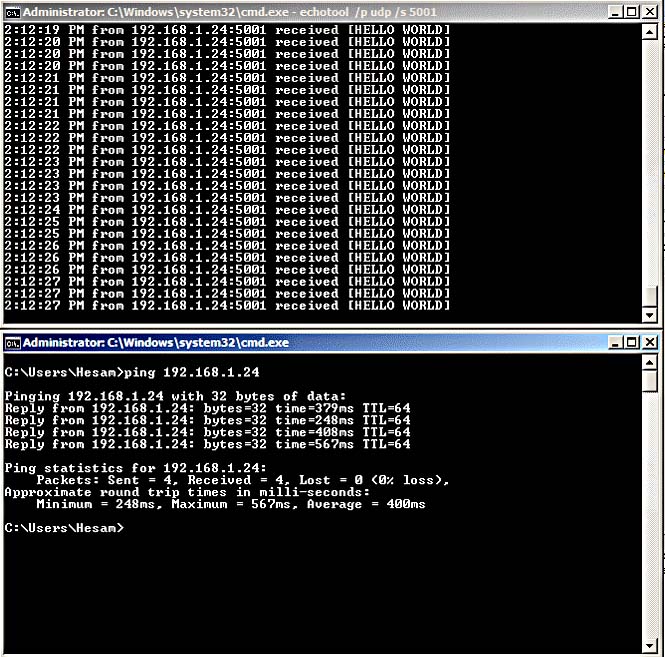
I prepare a UDP server which is listens to port number 5001.
now compile the project and burn it to the Atmega8. You can see the messages on the command line like
this:
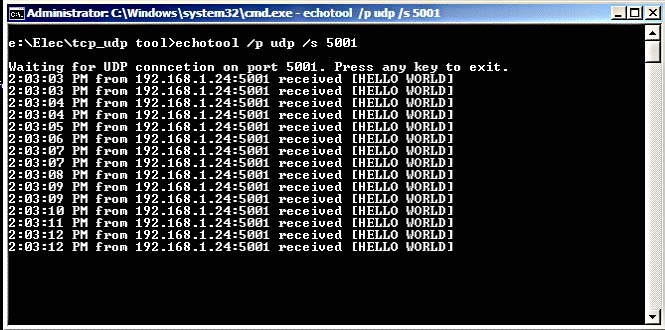
Let’s ping our UDP client. As you can see below, there is a considerable delay with an average of 400ms that
is because of our loop delay and can be reduced by lowering loop delay.
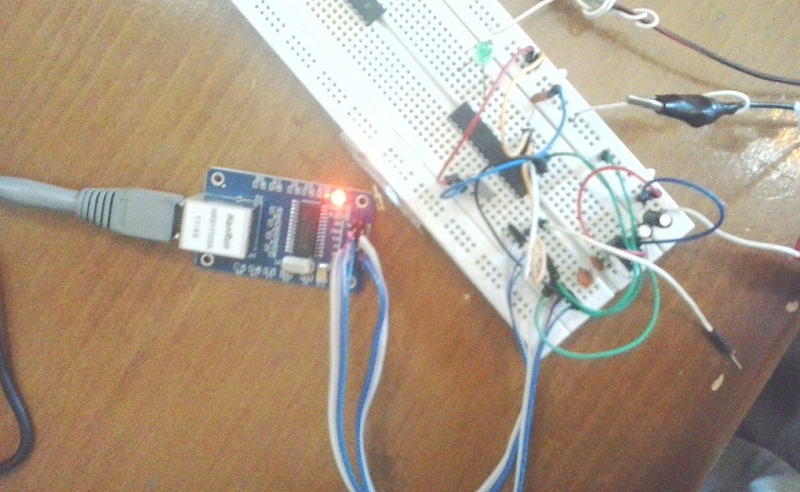
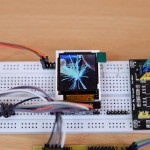
At the end take a look at the simple circuit that I implemented for this project:

Download code: mega8_udp_client
Hi,
Do you need some help updating pocketmagic.net?
As an experienced web writer, I can update your site with quality texts that will keep it fresh and interesting to both your visitors and the search engines!
Would you like to see some samples of my texts?
Best regards,
Jenny Lewis