Making all kind of photo editing, at some point when editing my wedding photobook I realized that I didn’t have and I also couldn’t find very easy over the internet high resolution objects. Especially flowers and more exactly poppy flowers because I needed them as I wanted to make a poppy flower column between 2 different photos.

Actually I realized that making high resolution photos of different objects will be very useful at some point so I started making photos with different kinds of flowers. My latest is a tulip.

But making a good photo wouldn’t be the only challenge that I would have to face because cropping the curvy flower petals didn’t look appropriate at all with the edgy selection turned out to be, using the Polygonal Lasso Tool from Photoshop
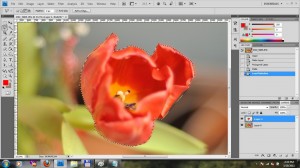
…so I had to look for alternatives. It’s simple: Pen tool from left Photoshop panel, it has an icon that looks like a pen, very suggestive. Now all you have to do is learn how to use it and practice. Let’s start with opening a photo with an objects we would like to crop. Make a layer from the background. Select the pen tool from the left panel. Set it to Paths from the upper panel under the main menu, the icon looks like a square with a pen in center. You can start the selection from anywhere, just take some time to analyze the photo and see where the shape is changing the direction.
How to use it:
1. Left click to create an anchor point
2.The next point: left click and holding it(don’t release it) drag a line, doesn’t matter how long it is. You’ll see you’ve created a curve. Now the curve doesn’t have to be perfect, because you can adjust everything afterwords. You can also see the point where you’ve made the left click which is the anchor point and two handles on each side of the anchor point, these handles can adjust the curves that you’ve created by holding ctrl and dragging the end of the handle, if you bring it closer to the anchor point you’ll make the curve smaller, if you bring it further you’ll make the curve larger. Move it up and down(relative to the handle) to adjust it to the right position. You can do this with the both handles to control the curve on the both sides of the anchor, just press the ctrl when adjusting. You can also adjust the anchor’s position by holding the ctrl and moving it to the right place. Play with it you’ll learn how it works this way. If you want to control only one handle at a time press alt key and drag the ending point of the handle, but this way you’ll release it from the other handle and the two handles will work alone now. If you want to control them at the same time again press ctrl+alt+the handle ending point.
3. You’ll have to create the next anchor point in the same way you did before. Left click – hold it and drag. Adjust as before..and so on.
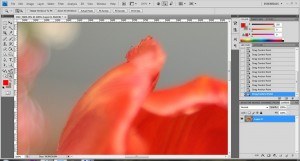
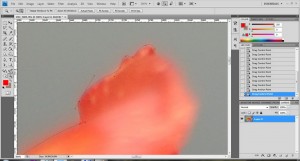
4. When placing the anchor points pay attention to where the shape of the object is changing it’s direction and place it there. Try not to make unnecessary extra anchor points..(as I still do). You’ll learn it by practicing and it’ll get more and more easier.
5. When you end the selection go to Paths tab, you’ll find it near the Layers tab at the right panel. You’ll see there the path you’ve just created. Under the Paths you have a line with some option, the third one that looks like a dashed circle selection named: Load path as selection, select it. Now you’ve created a selection from your path. You can also do this by holding ctrl and left click on the path’s square icon.
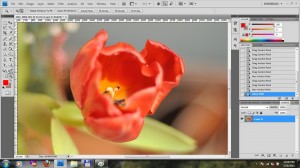
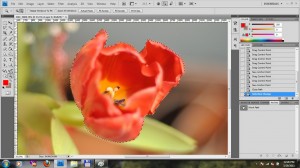
6.After you’ve selected it go to Layers. Select the layer with the image, press ctrl+c to copy the selection. Press ctrl+v to paste the selection. Now you have the object in the new layer and you can use it whenever you need this object.
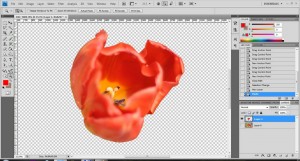
I always felt the need for such a tool in Photoshop and never knew it existed, it is an amazing tool, you’ll find it very useful in other situations also like when you would like to create a custom shape. Only that after selecting the pen tool you should afterwords select the Shape Layers not the Paths from the upper panel under the main Photoshop window menu, to create a shape. You can create it in the same manner previously described.
This is a lot of information in such a short article. Maybe not all the needed details have been highlighted here. If you feel you haven’t completely understood everything ..or anything just read this long and step by step tutorial that I my self have learned from: http://www.photoshopessentials.com/basics/pen-tool-selections/

Actually there are a lot of other options in PS.
You an use magnetic lasso 😉 that will snap in place where there is a good contrast.
Thanks Horatiu for pointing out another great method, actually simpler and better for this purpose! I’ve just tried it and I managed to make the selection in a matter of seconds. And for those who don’t know how to use it: 1) Select the Magnetic Lasso Tool from the left panel. 2)Left click anywhere on the edge of the object you want to crop. 2)Follow the margins of the object with the Magnetic Lasso Tool, you can see the selection will be automatically created, if something goes wrong just go back with backspace and add another fastening point yourself. 3) End the selection by making the last point on the starting fastening point.
What other great tools do you think would work for this purpose?